Quick Start
A lit, framed scene in under a minute.
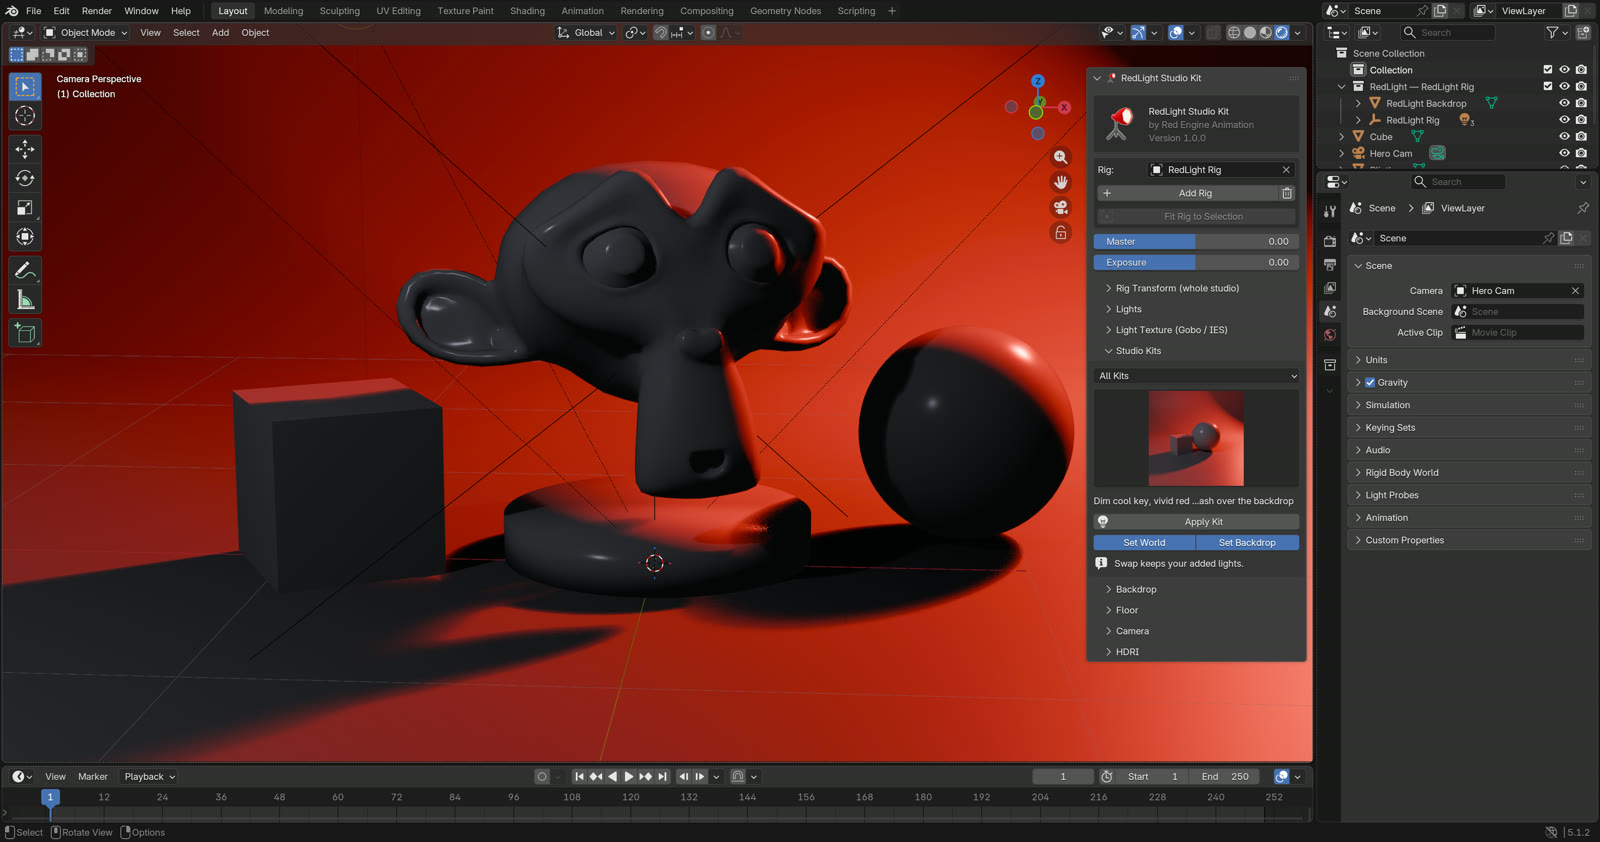
- Open the 3D Viewport sidebar (
N) and click the RedLight tab. - Select your model and click Fit Rig to Selection. This creates a rig, moves it under the model and sizes the studio to fit.
- Open Studio Kits, click the thumbnail and pick a kit. Use the category dropdown above it to narrow the grid.
- Click Apply Kit. The lights, world colour and backdrop appear.
- Switch the viewport to Rendered to see the result.
Next steps
- Try another kit. Swapping replaces only the kit's lights; anything you added yourself stays.
- Dim or brighten everything with Master.
- Change the backdrop shape in Backdrops & Floor.
- Add a camera in Camera.
- Edit one light in Lights.
No model selected?
You can skip step 2. Apply Kit creates a rig at the world origin if the scene has none. Kits are sized for a subject about 1 m tall.